Introduction
Several different deep learning frameworks exist today, each with their own strengths, weaknesses, and user base. In this section, we’ll focus on the two most popular frameworks today: TensorFlow and PyTorch.
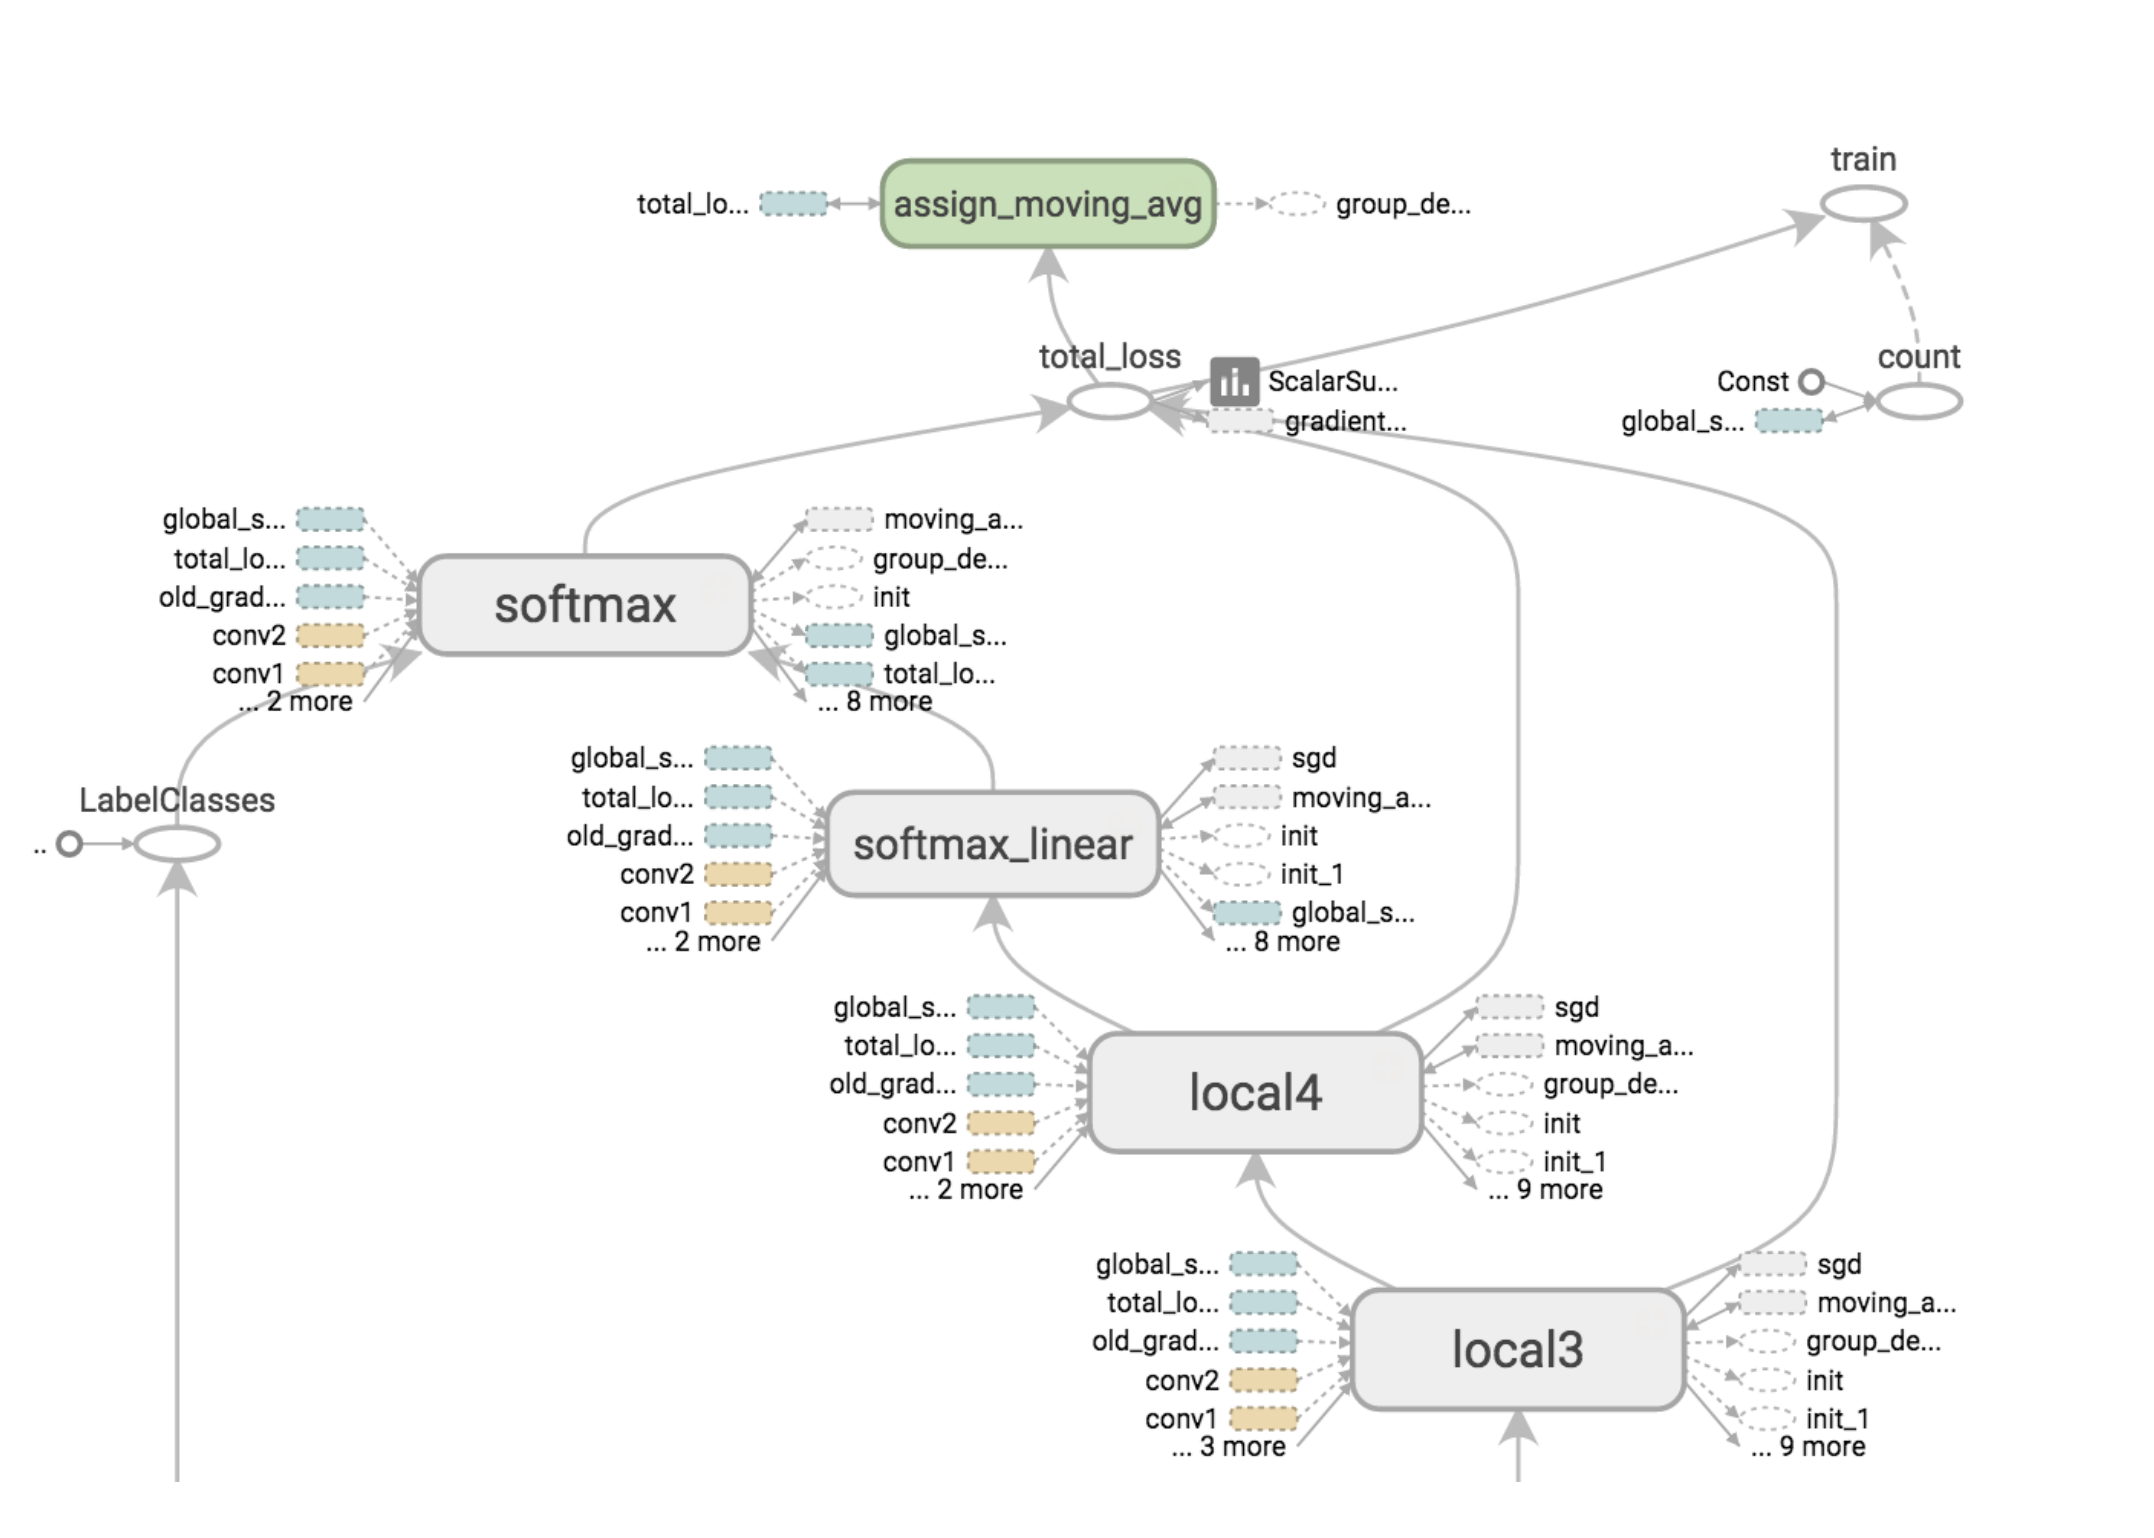
The main difference between those frameworks is - code notwithstanding - the way in which they create and run computations. In general, deep learning frameworks represent neural networks as computational graphs:
 |
Our variables, such as the weights, biases, and loss function, are graph nodes defined before training. During training, the graph is run to execute the computations.
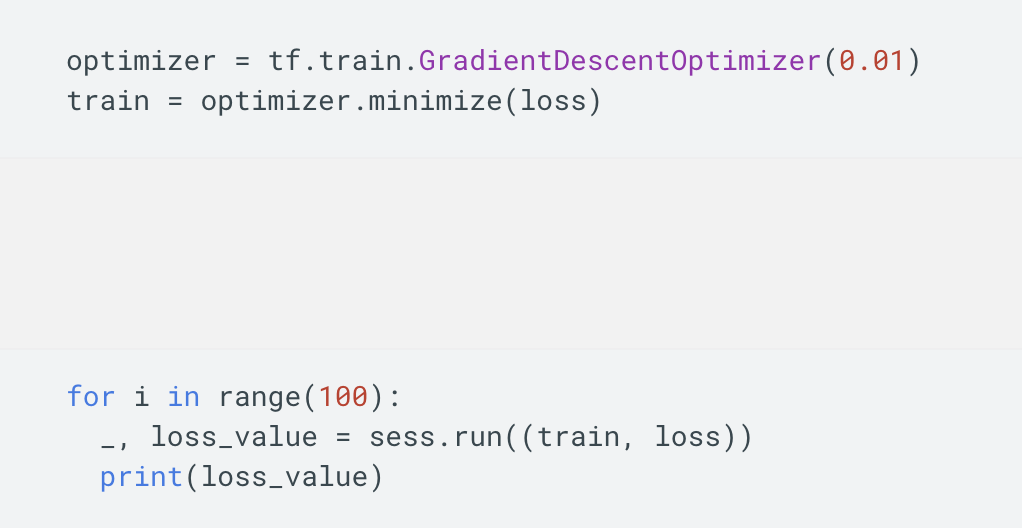
TensorFlow and PyTorch, our two chosen frameworks, handle this computational graph differently. In TensorFlow, the graph is static. That means that we create and connect all the variables at the beginning, and initialize them into a static (unchanging) session. This session and graph persists and is reused: it is not rebuilt after each iteration of training, making it efficient. However, with a static graph, variable sizes have to be defined at the beginning, which can be non-convenient for some applications, such as NLP with variable length inputs.
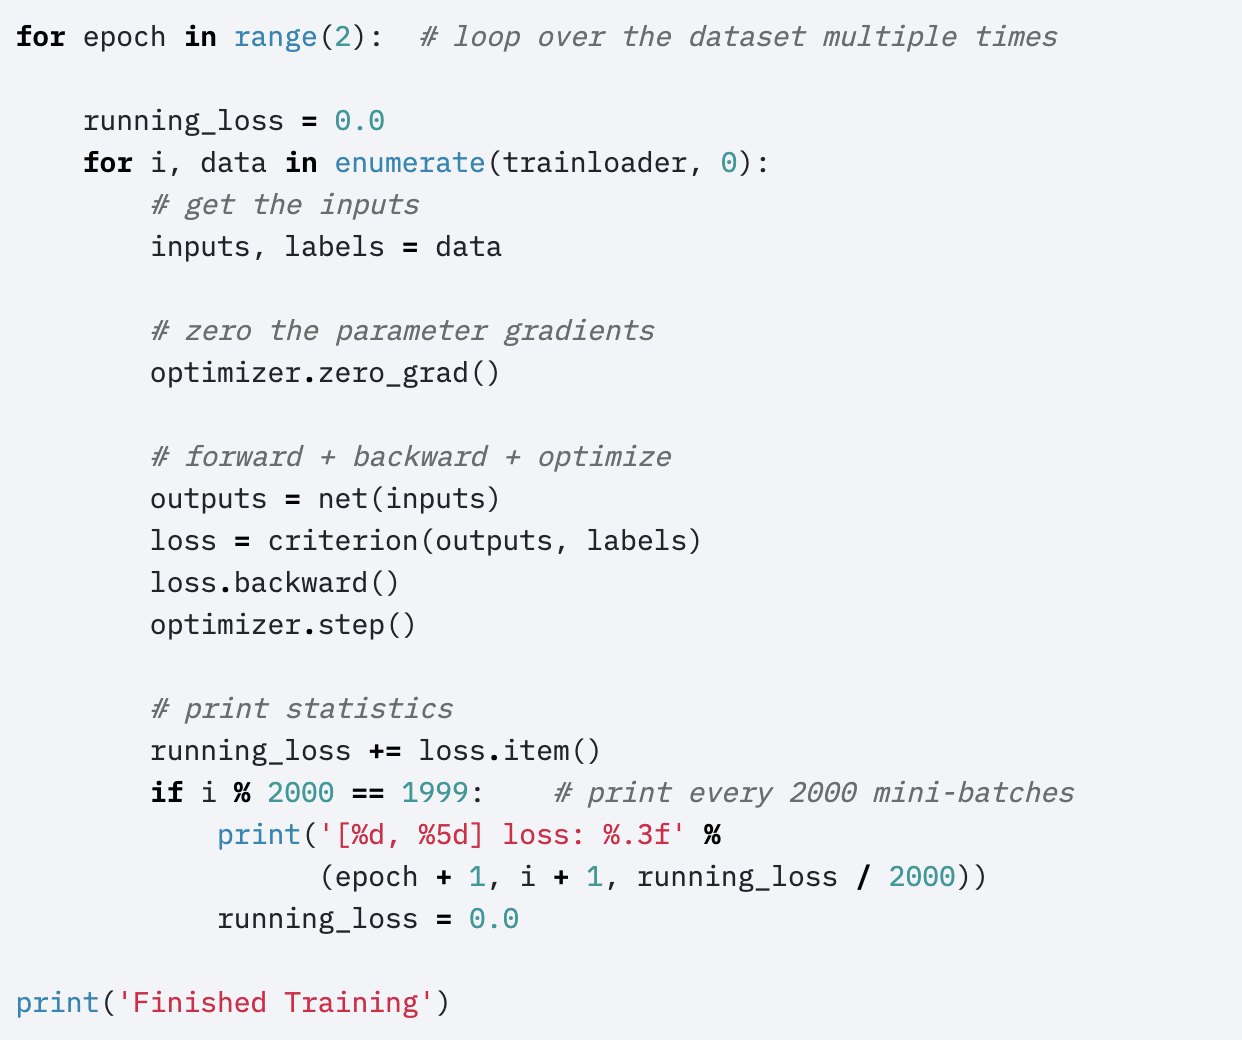
On the contrary, PyTorch uses a dynamic graph. That means that the computational graph is built up dynamically, immediately after we declare variables. This graph is thus rebuilt after each iteration of training. Dynamic graphs are flexible and allow us modify and inspect the internals of the graph at any time. The main drawback is that it can take time to rebuild the graph. Either PyTorch or TensorFlow can be more efficient depending on the specific application and implementation.
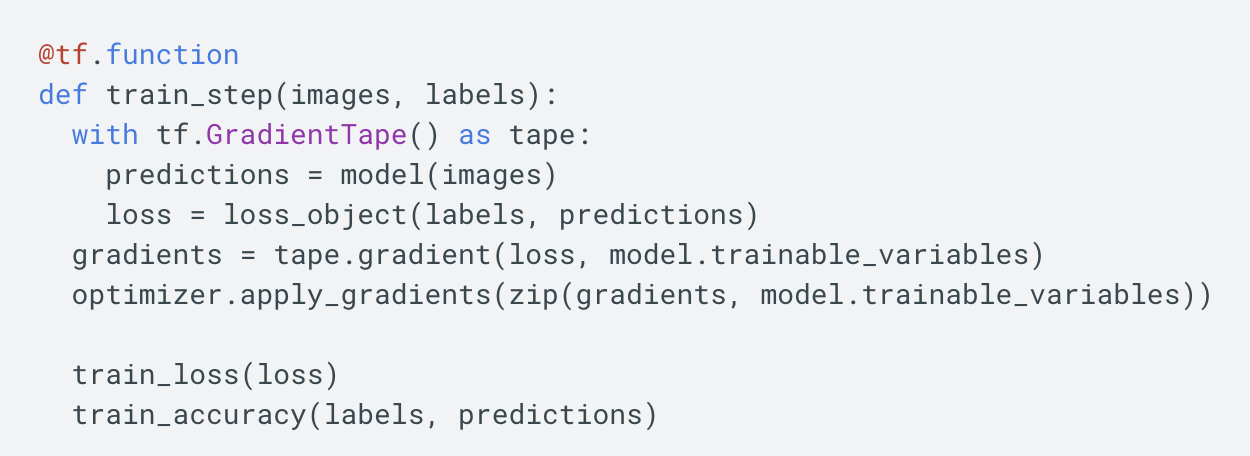
Recently, a new version of TensorFlow, TensorFlow 2.0 Alpha, was released. This new TensorFlow uses dynamic graphs as well. We’ll take a glance at it in this section.
Now, let’s cover the main topics:
- We’ll walk through how to build a full TensorFlow deep learning pipeline from scratch. A PyTorch notebook is also available as a comparison.
- We will compare and contrast PyTorch vs. TensorFlow vs. TensorFlow 2.0 code.
- We’ll also walk through how to run remote Jupyter notebook servers on AWS instances.
TensorFlow Deep Learning Pipeline
Here is an possible list of steps to implement a deep learning pipeline:
- Download the dataset
- Load and preprocess the dataset
- Define the model
- Define the loss function and optimizer
- Define the evaluation metric
- Train the network on the training data
- Report results on the train and test data
Let’s look at a TensorFlow notebook in Colab to see how to build each of those steps.
TensorFlow Walkthrough (w/ custom dataloader)
PyTorch Walkthrough (for reference)
Comparing TensorFlow, PyTorch, and TensorFlow 2.0
The main differences between these frameworks are in the way in which variables are assigned and the computational graph is run. TensorFlow 2.0 works similarly to PyTorch.
 |
With TensorFlow 2.0, we don’t initialize and run a session with placeholders. Instead, the computational graph is built up dynamically as we declare variables, and calling a function with an input runs the graph and provides the output, like a standard Python function.
 |
 |
 |
Running Jupyter notebooks on an AWS EC2 GPU Instance
We’ve seen in the Coursera assignments that Jupyter notebooks are useful research tools for developing and evaluating models. We’ll now see how to run Jupyter notebooks on EC2 instances so that you can create deep learning experiments and run them on a GPU from anywhere.
This guide assumes that you’ve already launched a p2.xlarge instance with the Deep Learning Ubuntu AMI. Instructions for doing this are provided in the Section 2 Post.
Configuring Jupyter
Before we use Jupyter, we’ll need to create a configuration file, so ssh into your instance with ssh -i PATH_TO_PEM_FILE ubuntu@INSTANCE_IP_ADDRESS
and follow these steps on your instance:
-
Generate a new Jupyter config file:
jupyter notebook --generate-config -
Edit
~/.jupyter/jupyter_notebook_config.pyusing your text editor of choice (nano ~/.jupyter/jupyter_notebook_config.pyis a good default) and write the following at the beginning of the file before all of the commented lines:c = get_config() c.IPKernelApp.pylab = 'inline' c.NotebookApp.ip = '0.0.0.0' c.NotebookApp.open_browser = False c.NotebookApp.port = 8888 c.NotebookApp.token = '' c.NotebookApp.password = ''
Running Jupyter
Now whenever you want to start a Jupyter notebook, navigate to the directory you’re working in and run jupyter notebook.
This will run a Jupyter notebook server on port 8888 of your EC2 instance by default, and if you’d like to run it on
a different port (because you’d like to run multiple notebook servers at the same time, for example), then you can specify
the port as a command line argument: jupyter notebook --port=8889. Note that the server will be killed if your SSH session gets
disconnected, so remain logged into your instance for the rest of this guide (see the end of this post for instructions on using tmux to keep the server alive across SSH sessions).
Using Jupyter from your local browser
We’ll need to set up port forwarding on your local machine so that your browser can communicate with your
remote Jupyter server. Choose an open local port (8888 is probably fine assuming you’re not running any other
Jupyter servers on your local machine, but I’ll be using port 9000), and run the following command to start forwarding your
local port 9000 to port 8888 of the remote instance: ssh -i PATH_TO_PEM_FILE
-fNL 9000:localhost:8888 ubuntu@INSTANCE_IP_ADDRESS. Anybody on your team who would like to connect to a Jupyter notebook
on your instance will need to run that command on their local machine first.
In your local browser, navigate to the URL localhost:9000 and you should arrive at the Jupyter dashboard. From there,
you can use the “New” button near the top right of the dashboard to create a new notebook, text file, directory, or terminal window, and you can use the “Upload”
button to transfer files from your local machine to your instance.
For Tensorflow projects you’ll likely want to use the tensorflow_p36 conda environment and for PyTorch projects you can use the
pytorch_p36 environment.
(Optional) screen/tmux
If you want to persist processes you launch from a command line on your instance across SSH sessions so that you can disconnect
without shutting down your Jupyter server, you can use either the screen or
tmux utilities. These are good utilities to know about for managing terminal windows on remote servers, so you’re encouraged
to look up tutorials for these utilities on your own. We’ll describe an example workflow using tmux.
- Create a new
tmuxsession on your EC2 instance usingtmux. - Navigate to the directory you’ll be working from and start your Jupyter server with
jupyter notebook - Detach from your
tmuxsession withCTRL-B D(hold the Control and B keys, release both, and press the D key). - Your Jupyter server will now stay up even if you log out from your instance. To verify this, logout with
exitorCTRL-D. - SSH back into your instance.
- Re-attach to your tmux session using
tmux attachto verify that your Jupyter server is still running.
 CS230
CS230

